Entradas

Mostrando entradas de 2016

Android Wear Xamarin First Steps

Imagen
Hello, in  this post I will talking about how to begin to create Android wear apps. In first instance, we need to know, what is Android Wear? Android Wear is the operating system for personal devices (wearables), the system itself is designed to be used in smart watches, smart bracelets. Devices Some of the devices that can run Android Wear: Motorola 360 LG G Watch LG G Watch R Samsung Gear Live Sony SmartWatch 3 ASUS ZenWatch To start to create android wear apps, we need to check in order that we have the next things: Required android Sdk & tools. Android SDK Tools v 24.0.0 or higher. Android 4.4W (API20). Android 5.0.1 (API21). If we don't have a physical device, we need to create a Wear Emulator: To verify that, we use Android SDK Manager, in Xamarin Studio, Menu Tools, Open Android SDK Manager: Now, we verify if we have installed the sdk's Also we need to set up an Android Wear emulator. For do it, we need to use 

Xamarin.Forms Picker

Imagen
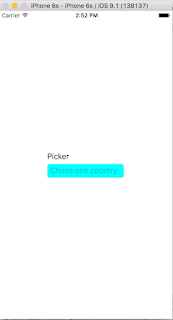
In this post, we gonna be see, the Picker Control in Xamarin.Forms The picker is a control that allows select one element from a predetermined list of options. The first thing that we need to do, is create a instance of Picker:             Xamarin . Forms . Picker   picker   =   new  Xamarin . Forms . Picker              {                 Title  =   " Chose   one   country " ,                 VerticalOptions  =   LayoutOptions . CenterAndExpand ,                 BackgroundColor = Color . Aqua              } ; Next, we need to asign the values for our Picker control, and we do it, on the next way:             picker . Items . Add   ( " Canada " ) ;              picker . Items . Add   ( " USA " ) ;              picker . Items . Add   ( " Mexico " ) ;              picker . Items . Add   ( " Brasil " ) ;              picker . Items . Add   ( " Argentina " ) ;              picker . Items . Add   ( &q

Xamarin.Forms Frame

Imagen
Hello, in this post we gonna be look how we can use a Frame in Xamarin.Forms This simple rectangular view sometimes is very usefull for presentation purposes. The first, we add a new Page, called FramePage. in the constructor we add a new View, the Frame View, also we declare some properties, like OutlineColor, and if we want that has Shadow around of the frame:              this . Content   =   new  Xamarin . Forms . Frame   {              // It   has   a   few  properties                 OutlineColor = Color . Blue ,                 HasShadow = true , } So, to avoid that the frame fill all the page, we add the properties to center the frame inside of the page:                 HorizontalOptions = LayoutOptions . CenterAndExpand ,                 VerticalOptions = LayoutOptions . CenterAndExpand , And for last, we add the content of the frame, in this case we add a single Label, Content =   new   Label {                     Text = " This   is

Xamarin.Forms WebView

Imagen
Hello, in this post we will talk about WebView with Xamarin.Forms, a WebView is a view that show a WebPage, or more simply HTML content. We can define the instance of a webview on the next way: WebView webView= new WebView(); In the property Source we asign the source of our content for our WebView. Look a few piece of code: public   class   WebViewPage   :   ContentPage      {          WebView   webView {   get ;   set ; }   =   new  WebView  () ;          public   WebViewPage ()          {              Label   TitlePage   =   new   Label   {                 Text  =   " Use   of   WebView " ,                 FontSize  =   Device . GetNamedSize   ( NamedSize . Large ,   typeof ( Label )) ,                 HorizontalOptions  =   LayoutOptions . Center ,                 TextColor = Color . White              } ;                                       webView . Source   =   new   UrlWebViewSource {                   Url  =   " https : / / mx . linkedin